Feeds:
Posts
Comments

Archive for the ‘roofing’ Category

Greg has spent another week or so working on the cob house, and this week I have been in awe of just how fast he is!  It really is incredible.

Greg tiled the countertop around the sink, and finished the salvaged chestnut portion of the countertop, as well as the butcher block from the Habitat Re-store.  The three different countertop sections looks quite nice together.  I love the chestnut!

DSC_0247

chestnut

chestnut

finished!

finished!

DSC_0700Greg also started a portion of the outdoor countertop:

DSC_0365I can’t believe all the interior plaster is finished!  Greg did one coat of earthen plaster in a few spots, and then two coats of lime plaster.  I love how plaster changes a space so dramatically, clearing away all visual distractions, allowing the curves of the walls and window reveals to really be appreciated.  So beautiful.  The lime really brightened the space up significantly as well.

DSC_0390 DSC_0564

first coat of lime

first coat of lime

DSC_0595

finish coat

finish coat

DSC_0686 DSC_0719 DSC_0721 DSC_0723And the earthen floor!  Greg did a mix with the red clay in the “living room” and a mix with the yellowish clay in the kitchen.  Check out the shapes in the red clay floor!  These will later be grouted after the floor is dry and finished.

DSC_0744 DSC_0750 DSC_0772 DSC_0782 DSC_0784
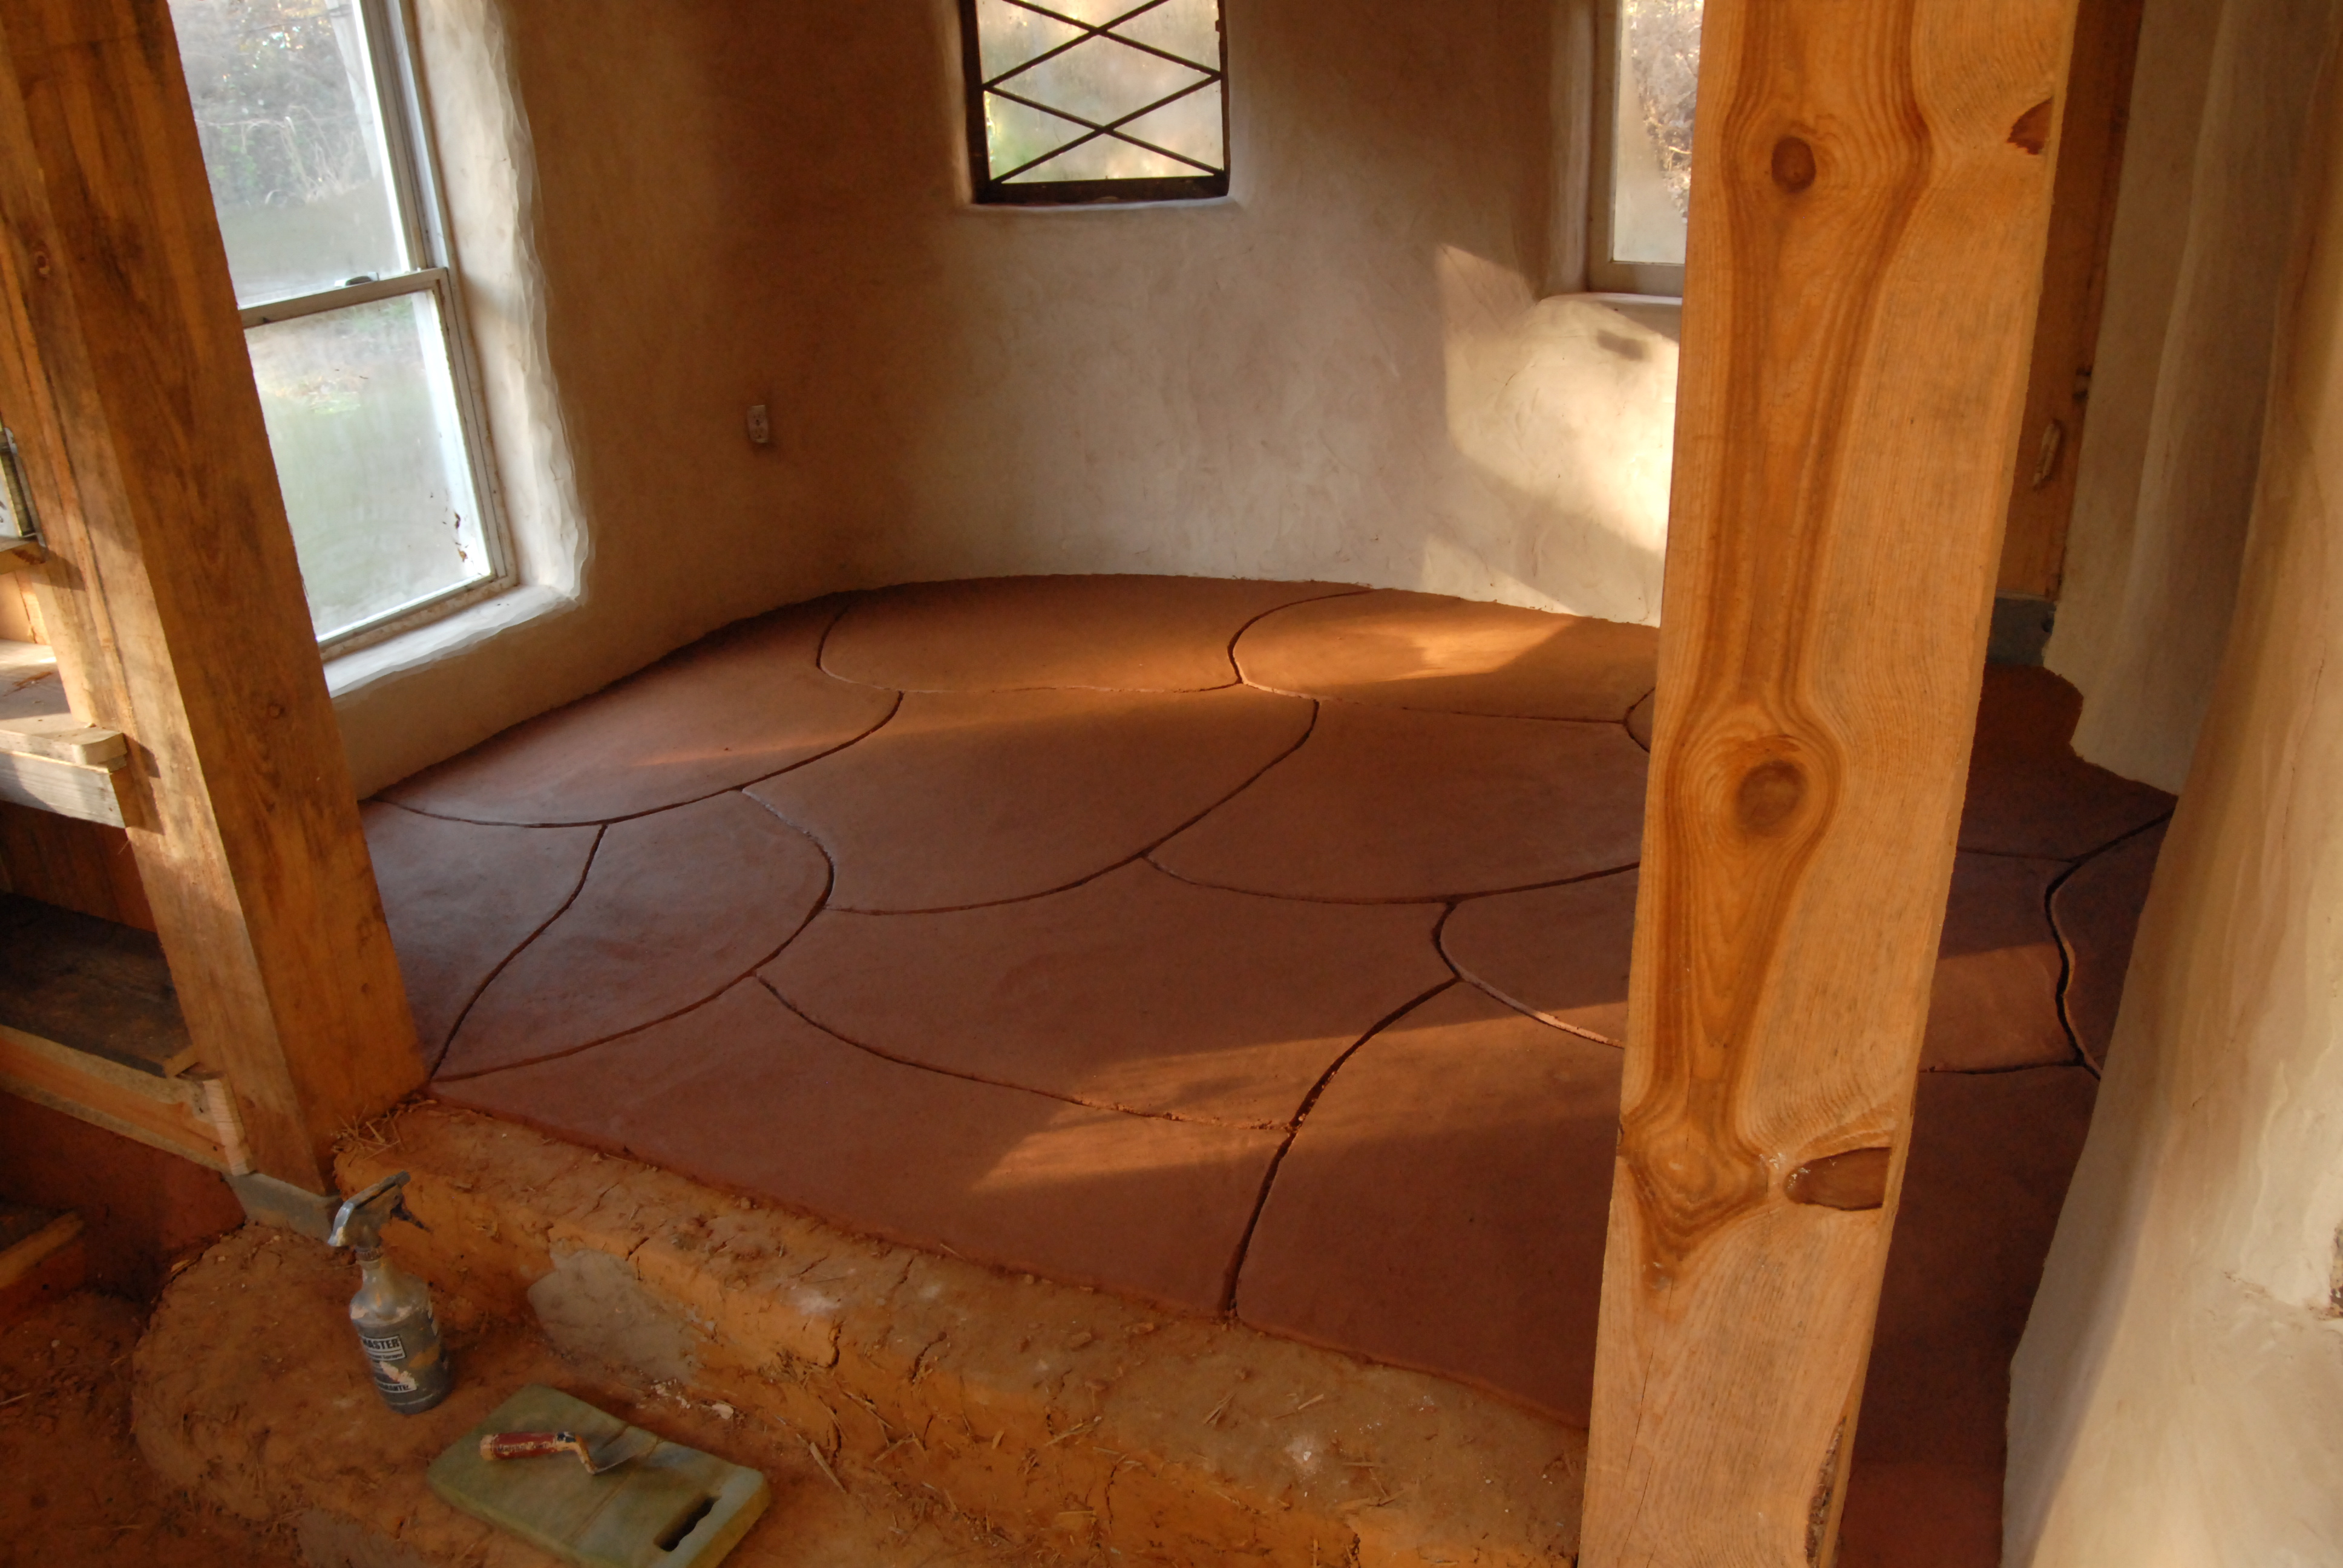
The next step will be oiling and waxing the floor once its all dry.  The way the space has come together fills my heart up in an indescribable way.  I am in love with this gentle space, so full of beauty.  I am so looking forward to spending time there with my sweet family.

Read Full Post »

a return to cob

We haven’t forgotten!  Time passes…life is full, and we have been busy.  My days have been completely immersed in the strange, magical, and irrational world of a two year old, and Greg has been in the middle of countless building projects (including a straw bale house for us!)  My patient little cottage has been waiting quietly, housing the occasional visitor, storing random items and crocks of various ferments.  But, finally, there is some time open for this sweet little cob house.  Greg spent all of last week working on the house, getting it ready to be our home this winter  We are focusing on getting the interior finished, as all the exterior plaster will likely wait until spring or summer.

Some pictures from last week!

A metal roof for the little gable above the back door, using scrap pieces from another project.  It still needs some work where it meets up with the cob and some of the cat steps.  I’m afraid that a couple of the steps will have to go!  But they will be replaced, ensuring that the cats will have full access to the eastern cat walk, should they so choose.

DSC_9748 DSC_9753 DSC_9774 DSC_9995

Greg poured the subfloor in the “living room,” trying out a mix with a bit more clay, using 1 clay to 3 sand.

subfloor!

subfloor!

And the culprit…

DSC_9737…who left these tracks:

DSC_9940

DSC_9935

Which gave Leo a good opportunity for a little lesson on how to trowel out cat prints:

DSC_9906 DSC_9962

Cob!  Greg got in a good amount of foot mixing, as there was a lot of cobbing to be done in odd places, as he worked on closing up the house and getting it prepped for plaster.  Luckily he had some help!  Leo was eager to join in a mix when I took him out to visit for a day.  My heart melted a bit…he’s a pretty good cobber!

DSC_0020 DSC_0022 DSC_0058 DSC_0070 DSC_0079 DSC_0086Ready for plaster!:

DSC_9943 DSC_9971 DSC_0110 DSC_9810 DSC_9855Greg also had the not so exciting job of switching out the wood stove, from the Scandia to our sweet Jotul 602 craigslist score.  Aside from being a nicer stove in general, the Jotul has the option of having the stove pipe exit from the top, which works out so much better in the small space.  Greg had to bust a new hole through the cob wall for the pipe to exit through, but that wasn’t the difficult part.  I had long ago returned my borrowed scaffolding, and now there is no easy, safe way to get up there and change the way the pipe is oddly bolted to the rafters in so many places.  Greg spent a full day, and then some, going up to the roof and down again working on changing my awkward installation.  It looks a lot better now…

DSC_9745 DSC_9747 DSC_9782Greg started building the cabinets under the counters, and also built some shelves next to the sink using mostly wood from the free pile at the sawmill.  He’s heading back out tomorrow to spend a couple days on the kitchen, installing the countertops and building shelving.

future countertop

future countertop

starting the cabinets

starting the cabinets

shelves

shelves

I’ll be back next week with another update!

Read Full Post »

What’s new with the cob house this month?  Lots of things!


As my belly grows larger each week, physical labor becomes more difficult and complicated for me.  I’ve been very lucky lately to have a lot of help from my friends, who’ve done most of the work on the house, in exchange for a meal, and my company….


Greg and Jeremy worked on dry stacking some urbanite steps, so I no longer had to use a five gallon bucket as the first step up to the second floor.  I’ve had some really big pieces of urbanite left in the pile that were way too large to use in the foundation, as well as just much too heavy for me to ever move.  Here’s Greg and Jeremy transforming those chunks of urbanite into my new set of stairs…

Mike and Greg came out on another weekend to help pour the subfloor in the first story.  The mix was 3 buckets of sand, 3 buckets of screenings, and 1/2 bucket of soaked clay.  Its amazing that such a small amount of clay can bind all that aggregate!


The work on the subfloor went pretty fast, so Greg and Mike decided to make an urbanite patio outside the entrance.  Greg started digging while Mike collected rubble for drainage.

Greg found access to my rubble trench, and some perforated drainpipe was laid in the drainage layer of the patio so that it empties directly into the trench.

found the rubble trench!

filling with rubble


and then a layer of screenings...

laying "stones"

the finished patio!


You may have noticed the freshly plastered interior walls in some of the above  pictures.  One weekend we had a work party to plaster the first story interior walls.  Greg and I, as well as our friends Ash, Giovanna, and Kristy, worked together plastering all the oddly shaped surfaces.  Between the bookshelves, niches, window reveals, floor joists, etc, there were a lot of awkward spaces to plaster.  But it was a lot of fun, and so satisfying to see the room transformed by the smooth, smooth plaster.  We used a beautiful yellow-brown clay that we found here on our land, and I really love the color.  I must have been too excited about plastering, because I forgot to take any pictures that day!  But here’s some before pictures:


some niches I carved...

pre-plaster


And the room post-plaster:

Yesterday Greg and Dan came out, and they worked on decking the roof for the outdoor bed.  The poor tulip poplar rafters have been naked and exposed to the elements since last summer.  But not anymore!  Greg and Dan used the rest of the pile of decking I had left over from the main roof, and there ended up being just enough to finish the job.

I’m thinking of trying an experimental “earthen roof”, involving  my pond liner scraps and a final layer of lime and tiles, but I’ll write more about that later.  And, as soon as the subfloor dries, we’ll be pouring the finish floor layer, sealing that with linseed oil and beeswax, and then I’ll finally be able to  inhabit the entire cob house!


Read Full Post »

Today was a good day.  Not only was it my final day of jury duty, but we also managed to get the EPDM rubber liner up onto the roof.  It took six of us to hoist it up onto the scaffolding, and move it up, step by step, onto the roof.

Since I’m neurotic, before we unfolded the liner we spent a while clearing all the ice from the roof, and then towel drying everything.  Then we finally rolled the liner off it’s paper tube, unfolded it, and then spent a while adjusting the position.

pre-pond liner

The liner was a little bit bigger than the roof, and a rectangle, so there are some areas that need to be trimmed.  I decided to leave the liner overhanging the roof edge for now.  I’m kind of enjoying the look.

Read Full Post »

About a month into the construction of the roof, it’s still not complete… but it’s coming along, and looking awesome.  I’ve been frustrated lately with how little time I’ve been able to spend working on the house.  I’ve been out of town a lot, first for Thanksgiving, and then to attend a cheesemaking course at a nearby university.  While out of town my laptop (among other things) was stolen, which means I’ve lost thousands of photos, including the vast majority of the photos from this building project.  And then I came down with strep throat…and jury duty.  Day after day of jury duty, which still isn’t over…and as I sit in deliberation with eleven other people in an overheated room, my EPDM pond liner sits patiently on a pallet by the cob house. 

All my complaints aside, a lot of work on the roof has happened, mostly due to my friends Greg and Steve.  I’m forever indebted to them both, because they’ve each spent a lot of time here lately, working on giving my house a sexy, sexy hat. 

The first step, after raising the ridge beam, was placing all the roundwood rafters.  They’re all tulip poplar, harvested from our woods, and each one was notched by Greg where it attached to the ridge beam.  They’re long enough for a 2.5 to 3 foot overhang, except on the west side of the house where there’s a 4 1/2 foot overhang! 

Once all the rafters were in place, we started with the decking.  The sawmill cut some 3/8″ by 10″ boards for us, which are thin enough to bend a little with the curves of the roofline.  The decking is attached directly to the rafters, and will be exposed in the interior of the house, as the ceiling in the second story.  Each piece of decking had to be custom cut, and we spent a lot of time making trapezoids.

The next job was attaching all the fascia, which are the boards that’ll hold in all the soil for the living roof.  We used pine and cedar milling scraps that were flat on one side and rounded on the other.  The boards varied a lot in shape, width, and thickness, which made it really fun for Greg as he custom cut each piece.   

fascia and 4.5' overhang

After all the decking and fascia were up, Steve put a layer of rigid blue foam insulation over the decking.  They’re scrap pieces from the Habitat work site dumpster, all odd shapes and sizes, pieced together with duct tape into a strangely beautiful blue board quilt.  I’m totally bummed that I lost all my pictures of this part of the project…  But I do have some pictures of the way Steve got the blue board up onto the roof, which was by throwing each piece as if it were a frisbee…

I had an old pool liner that I got for free, but it came with its fair share of teeny pinholes.  So I broke down and bought a new EPDM pond liner, which cost me $400!  Eeek!  We put the used pool liner over the blue board layer, mainly to keep the insulation from blowing away until we can get the EPDM up onto the roof.  The pond liner weighs between 250 and 300 pounds, so it’ll take the effort of a few people to get it up the scaffolding and onto the roof.  Hopefully that’ll happen sometime in the next few days!

Read Full Post »

After cobbing day after day without a break, in addition to working full time, I’ve let the pace slow the last couple of weeks, spending more time hanging out with friends, reading, taking walks through the woods, and finally returning some phone calls and emails.  As the sun sets earlier each evening, just to wake up later each morning, I’ve been hearing the pending winter weather whispering to me, telling me to take it slow, and catch up on some sleep…

We have still been working a lot on the cob house, cobbing some random spots, trimming and shaping walls and window reveals, and doing some much needed site clean-up.  I built a hearth for our tiny wood stove, out of urbanite and cob (I’ll post some pictures of it soon).  And Noel and Gray spent a lot of time in the woods, harvesting and de-barking tulip poplar to use as rafters.

For the ridge beam I found a nice sourwood tree with a gentle curve, and Noel and I spent hours last weekend shaving all the bark off.  We only have one drawshave, so Noel and Gray made an improvised drawshave by taking a large knife we had dumpstered from behind the thrift store, and pounding it into a piece of wood, creating a double handled blade.  It actually does a great job getting the bark off all the roundwood!

On Sunday we managed to carry the ridge beam out of the woods and place it on top of this two story building.  It took at least eight of us to haul it from the forest, and even with that many people it was still really, really heavy.  My shoulder is still sore…  But its worth all the pain, because I’m really looking forward to not having to see this anymore:

On Monday my friends Greg and Steve worked on placing rafters and securing them to the ridge beam.  Each rafter is notched where it rests on the beam, and also secured with screws.  The ends of the rafters that rest on the wall will also be attached to “deadmen,” which will further anchor them to the walls.

Noel rounds the edges

About half the rafters are in place, and we’ll be working later this week on the rest of them.  Soon enough I’ll be able to fold up all these tarps, and sleep peacefully through rainy nights…


Read Full Post »