Feeds:
Posts
Comments

Archive for the ‘plaster’ Category

Plaster Love

I have not posted to my blog in a long time.  I have no excuses other than the all consuming busyness of parenting combined with house building combined with no internet access.  I apologize for any comments I never responded to, as I simply have not logged in here in a long time.  I hope to do so more this year!  We have been busy finishing our straw bale house, which we hope to be moving into soon.  Greg has been working on it full time for many months now, and Leo has been going to preschool two days a week since the fall, so I have had a chance to work on our house as well.  Since the beginning of my full time parenting journey I have not had time for much else, and have been truly enjoying this opportunity to once again spend a chunk of uninterrupted time working with my hands.  It is time I cherish, with an even greater appreciation for the amazing material I fell in love with years ago.  I love clay.

red clay plaster

red clay plaster

Our straw bale house is much larger than our cob house, and soon we will be moving from 300 square feet to about 800 square feet of living space.  This has given us an opportunity to enjoy lots and lots of plastering!  We were able to complete our three coats of exterior plaster before the cold temperatures set in, and spend the winter finishing the inside with the wood stove warming our work days.  A luxury we did not take for granted!

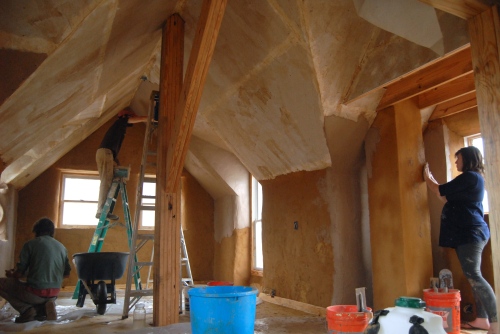
When I plastered my cob house I had minimal plastering experience, and was just learning to use a trowel.  I plastered most of my house with a yogurt container lid!  I have had a few opportunities to plaster again every so often, but this winter I got to immerse myself in it.  And I fell in love.  We decided to plaster the interior with all clay plasters, aside from a couple places where there is lime plaster.  My wonderful friend Joelle came to visit us for a week in December as we finished up our base coats over the bales and began our finish plaster.  I met Joelle the year I began constructing the cob house, as she signed up for my cob workshop.  After the workshop Joelle came back to visit and work on the house with me many times.  So much of my house was built by Joelle!  So much so that I will always think of her when I think of my house.  Joelle has continued working in natural building ever since, and is a talented plasterer, among other things. I was excited to have her work on our straw bale house as well, and enjoyed learning from her. Even though she was 7 months pregnant, Joelle drove down here and slept on our cob house floor, and worked all day plastering for a week straight!

15982995686_97258d8aa9_o

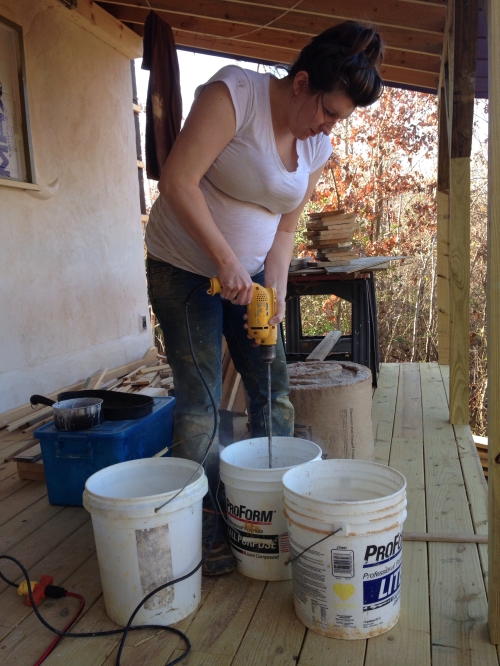
kaolin plaster test batch

kaolin plaster test batch

Joelle convinced us to used bagged clay for our finish plaster.  After many, many hours of digging, soaking, and screening site clay in freezing temperatures for our base coats we were happy to experience to luxury of dried powdered clay.  We live near STARworks, where there is a factory for processing local clays for the many ceramic artists in the area, where there is a rich history of pottery making.  What a resource!  We decided on a kaolin clay as well as the beautifully red Okeewemee clay.

Base coats of earthen plaster, using site clay:

15528285214_867f4b050e_o 15528284454_e6503b562a_oKaolin clay plastering:

16150628175_21ec653042_o DSC_5348 DSC_5350finished!:

Joelle's swirls!

Joelle’s swirls!

DSC_6265 16225606210_a5d21a6321_oThe kaolin has grown on me.  At first its white-ness was strange to me, as I am used to the colors of our clay soil.  But now I am in love with its brightness and neutral gentleness.  I love the floor to ceiling complete continuity of the plaster as well, although it was not the easiest plaster job.  But it is so lovely.

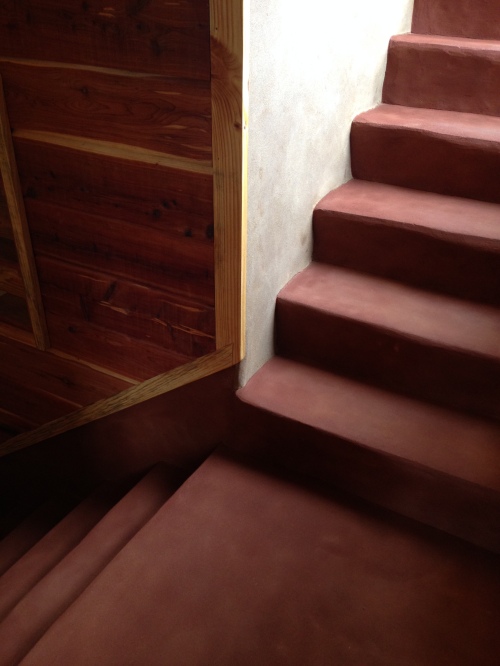
We used the red Okeewemee clay downstairs.  I love walking into the house and feeling the warmth and rich red color of the plaster.  It really can’t be captured in a photo, the way the plaster reflects light just has to be experienced.  I also don’t currently have many pictures of the downstairs on my computer to upload right now.  But here are a few:

16729579388_f2555721ae_o 16294887494_42fdf17f58_o 16731156669_a26b174d7a_o

We used the same red clay for our earthen floor mix that we used on our stairs.  Once sealed with linseed oil the color deepens dramatically:

16787302995_760b9bfcff_o

In the room with our to-code flush toilet, I plastered with a mix of the red clay and kaolin, with the addition of a lot of chopped straw.  I think this might be my favorite plaster in the house, and I’ll have to take some nice photos of it soon.  But for now here are two from my phone.  I sealed it with linseed oil around the sink area, for water resistance.  I love the way linseed oil can affect the color of plaster!  It brings out the golden hues of the chopped straw as well:

16729984470_8d8a41b14a_o 16601180389_2506642ea7_oWhen we completed all the plastering I was satisfied with the accomplishment, but sad to end my series of day after day of peaceful focused plastering.  I am looking forward to all the opportunities for spring time plastering on the many other unfinished buildings on our property.  As well as, hopefully, finally plastering the rest of the cob house!

And thank you Joelle!!!

Read Full Post »

What’s new with the cob house this month?  Lots of things!


As my belly grows larger each week, physical labor becomes more difficult and complicated for me.  I’ve been very lucky lately to have a lot of help from my friends, who’ve done most of the work on the house, in exchange for a meal, and my company….


Greg and Jeremy worked on dry stacking some urbanite steps, so I no longer had to use a five gallon bucket as the first step up to the second floor.  I’ve had some really big pieces of urbanite left in the pile that were way too large to use in the foundation, as well as just much too heavy for me to ever move.  Here’s Greg and Jeremy transforming those chunks of urbanite into my new set of stairs…

Mike and Greg came out on another weekend to help pour the subfloor in the first story.  The mix was 3 buckets of sand, 3 buckets of screenings, and 1/2 bucket of soaked clay.  Its amazing that such a small amount of clay can bind all that aggregate!


The work on the subfloor went pretty fast, so Greg and Mike decided to make an urbanite patio outside the entrance.  Greg started digging while Mike collected rubble for drainage.

Greg found access to my rubble trench, and some perforated drainpipe was laid in the drainage layer of the patio so that it empties directly into the trench.

found the rubble trench!

filling with rubble


and then a layer of screenings...

laying "stones"

the finished patio!


You may have noticed the freshly plastered interior walls in some of the above  pictures.  One weekend we had a work party to plaster the first story interior walls.  Greg and I, as well as our friends Ash, Giovanna, and Kristy, worked together plastering all the oddly shaped surfaces.  Between the bookshelves, niches, window reveals, floor joists, etc, there were a lot of awkward spaces to plaster.  But it was a lot of fun, and so satisfying to see the room transformed by the smooth, smooth plaster.  We used a beautiful yellow-brown clay that we found here on our land, and I really love the color.  I must have been too excited about plastering, because I forgot to take any pictures that day!  But here’s some before pictures:


some niches I carved...

pre-plaster


And the room post-plaster:

Yesterday Greg and Dan came out, and they worked on decking the roof for the outdoor bed.  The poor tulip poplar rafters have been naked and exposed to the elements since last summer.  But not anymore!  Greg and Dan used the rest of the pile of decking I had left over from the main roof, and there ended up being just enough to finish the job.

I’m thinking of trying an experimental “earthen roof”, involving  my pond liner scraps and a final layer of lime and tiles, but I’ll write more about that later.  And, as soon as the subfloor dries, we’ll be pouring the finish floor layer, sealing that with linseed oil and beeswax, and then I’ll finally be able to  inhabit the entire cob house!


Read Full Post »

Over the last couple of weeks I’ve been focusing on making the second story room livable.  After finishing all the cob above the windows and around the rafters, I was really, really excited to get some plaster on the walls.  Watching the cob walls get dressed in a smooth plaster was one of the most satisfying moments of this project for me… to have one room of the house start to feel complete is the realization of a lot of hard work and planing, and it feels great!

Last week we started off by testing our mix on the bench in the first story.  Our mix was one part soaked lime to three parts sand, a little bit of light yellow ocher pigment, and a small amount of alpaca fiber and deer fur.  I’ve been lucky enough to inherit some lime that’s been soaking for five years!   And the alpaca fiber was given to me by a nearby farm, while the deer fur has been laying around from some hide tanning projects.  (The pigment and the sand were purchased).  After plastering the bench, we decided to leave the fiber out of the rest of the mix, as it was clumping up into some hairballs…

Here’s a picture of the plastered bench:

We started plastering the upstairs last week, and got half of it finished the first day, with the rest of the room finished within the week.  In the end it took about three batches of plaster, with each batch being 4 full five gallon buckets of material.

As a side note… always wear gloves when working with lime!  The first day plastering I could only find one of my gloves, and was too eager to plaster to waste any time looking around.  The lime dried out my skin, and ate some holes in my fingertips that were pretty painful.  I’ve been vigilant about wearing gloves during the days since then…

I need to take some better photos soon, but here’s a couple from the first plaster session:

After finishing most of the plaster, I couldn’t wait to remove the tarps from the floor.  Those tarps have been hiding the beautiful wood floor since last summer, and I’ve been eager to get rid of them.  They were actually cobbed into the wall about 1/4 inch, so I had to cut them to remove them.  Once I got the tarps out of there, my friend Steve came over, and spent hours and hours sanding the floor boards.  Now instead of a clay/straw/tarp floor, our floor looks like this:

Greg came out a couple times lately, and in addition to helping me plaster, he worked on building a small door for the second story, completely out of scrap wood.  With a small window at the top and a cat door at the bottom, it’s looking pretty adorable.  This door is 3’3″ tall, and around 23″ wide…

Greg started working on some shelving, too, and once the shelves are done and the floor is finished, that room will be complete!


And because my cats are so cute…

here’s a picture of Bastet sitting in the round window:

Read Full Post »